RcBuildingCreateFromRoofPrint
| Command Name | Icon | Menu Path |
|---|---|---|
| RcBuildingCreateFromRoofPrint | Not yet in menu (CLI only) |
Overview
This command processes roof geometry for the 3D modeler.
Prerequisites
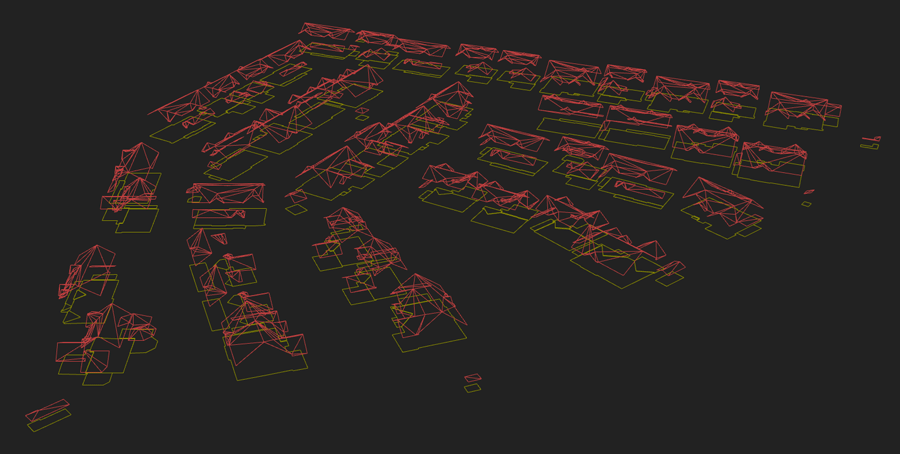
- Requires closed 3D roof curves.
- Input curves can be either attributed or raw geometry.
Attribute Management
- Building Grouping: If attributes are present, a common identifier (e.g., Building ID) is used to group multiple roof parts. This value is mapped to the
BuildingIDproperty in the modeler classes. - Elevation (ZMin): An optional attribute can define the building's base altitude. If provided, generated Roofprint curves are set to this Z-value; otherwise, they are created at Z = 0.0.
Grouping for Raw Geometry
- If the input curves lack attributes, they must be pre-grouped. The command uses Rhino Group membership to identify building units.
Output Options
- Users can choose to either transform the original curves or duplicate them to create new entities compatible with the 3D modeler.
Workflow
Step 1: Initial Options
When launching the command, the first prompt defines the generation logic:
RoofPrintLayer: Select the source layer (e.g., 'Roofs1').ComputeConstrId(yes/no): Initialize theConstrIDattribute. Recommended: yes.OriginalCurves(duplicate/modify): Duplicate preserves source geometry.
Step 2: Attribute Mapping
The second prompt defines the data structure:
- BuildingID: Grouping attribute (e.g., 'id'). Falls back to Rhino Groups if undefined.
- ZMin: Elevation attribute (e.g., 'r_zminid'). Created at Z=0.0 if undefined.
Step 3: Execution & Selection
- Review the summary displayed in the command line.
- Select curves: Pick specific curves or hit
[Enter]to process all objects.
Example
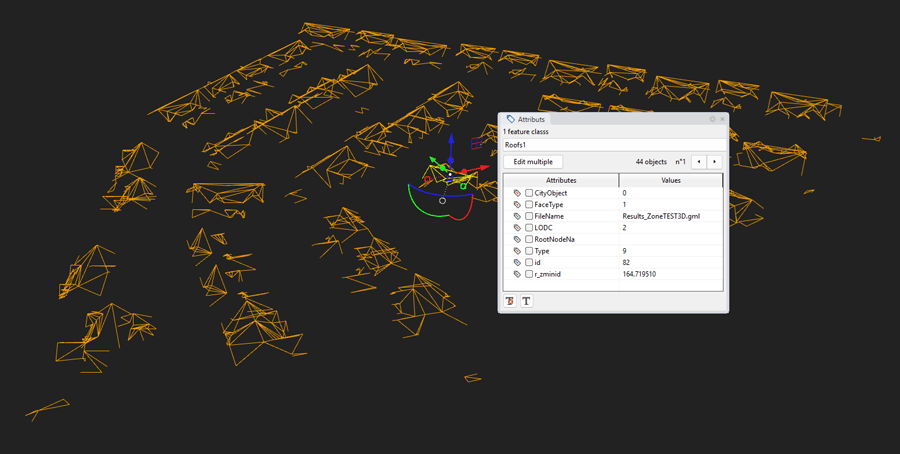
In this example, we use roof curves from a Shapefile (3D Polygons) in the 'Roof1' class.
Upon launch, the command line displays:
Options (RoofPrintLayer=nolayer ComputeConstrId=true OriginalCurves=duplicate):
By clicking on the RoofprintLayer option, we select the “Roofs1” layer
Confirm our choices with [Enter]
The command line now displays:
Define the potential attributes (BuildingID=undefined ZMin=undefined):
By clicking on ‘BuildingID’, we select the ‘id’ attribute of the ‘Roof1’ class
Attribute to be used as “BuildingID” (CityObject FaceType FileName LODC RootNodeNa Type id r_zminid):
The command line changes to:
Define the potential attributes (BuildingID =id ZMin =missing):
By clicking on ‘ZMin’, we select the ‘r_zminid’ attribute from the ‘Roof1’ class.
Confirm our selections with [Enter]
Upon launch, confirm your choices with [Enter]. The CLI displays the selection details:
| • layer containing the roof curves: 'Roofs1' • use attribute 'id' as a 'BuildingID' • use attribute 'r_zminid' to fix the Z of the Footprint curves |
Next, select the curves and press [Enter]. The command line displays the final summary:
| • feature class "Roofprint" created ✔ • feature class "Building" created ✔ • load 2 feature classes: "Building", "Roofprint" loaded • "Building", "Roofprint" objects stored • 141 feature class "Building" items prepared • 1930 feature class "Roofprint" items prepared |
The system confirms success:
(ツ) you can now use the RcBuildingModelerModelize command to create 3D buildings!
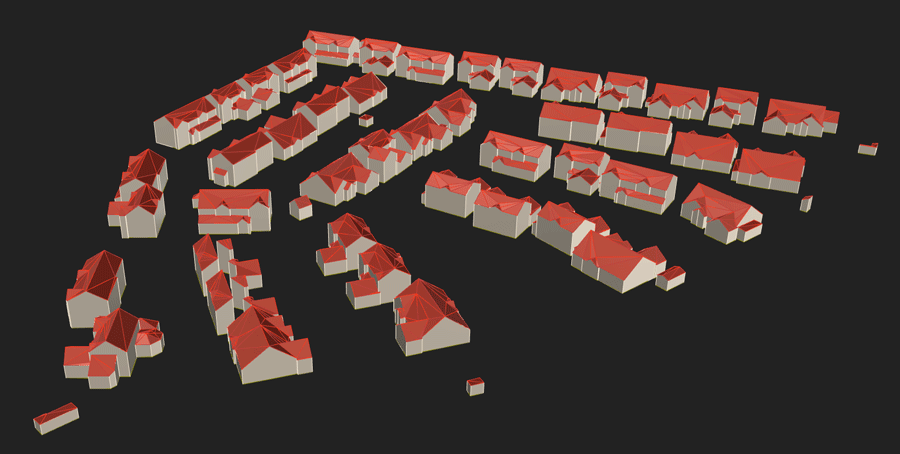
Here is the result after modelling